
 One word: amazing. You MUST make these, and you will never buy a packet from the supermarket again. They are well worth the (not very much) effort.
As you might expect from my many recent posts about the state of my kitchen, I actually made these a few weeks ago. I saw the recipe on Felicity Cloake’s excellent ‘How to cook the perfect …’ series, and did a quick mental inventory of my kitchen cupboards, realised I had all the requisite ingredients, and so got cooking immediately.
I love chocolate digestives. I can easily eat half a packet of them, dunked in tea. I saw an episode of Secret Eaters recently where the secret eater was unknowingly filmed eating her way through a pack of biscuits while sitting on the sofa in front of the telly – mindlessly dunking and eating, dunking and eating, dunking and eating. And I thought “that’s me, that is”. Because I can’t stop at just one or two, I tend not to have biscuits in the house, but if I did, my first choice would be milk chocolate digestives.
And whilst we are on the subject, my other favourite biscuits include:
- Chocolate chip and nut Boasters (I will eat the whole packet in one go)
- Fig rolls
- Malted milks (also dunked)
- Chocolate malted milks
- Hob Nobs
- Chocolate Hob Nobs
- Shortbread
 Most other biscuits I can take or leave, but I have made my own custard creams and oat shortbreads, and they are seriously out of this world. Even the raw dough is delicious (usually the sign of a good biscuit in my view), and the digestive had an equally gorgeous raw dough so when I started munching on it I knew they were going to be good.
The biscuits are really simple to make, especially if you have a food processor. As Felicity had already done all the research, I followed her recipe to the letter, and was not disappointed.
Firstly you need 170g porridge oats (or medium oatmeal according to her recipe, which is I suppose the same thing), which I blitzed in the food processor to get a finer crumb for the finished biscuit, as I didn’t want to end up with a flapjack. Then add 170g wholemeal flour and 150g cold butter and blitz it until you end up with a mixture which resembles breadcrumbs. Add 1/2 tsp bicarb, 55g muscavado sugar and 1/2 tsp salt and blitz again, and then drip a little milk (2-3 tbsp) into the funnel until it brings the mixture together.
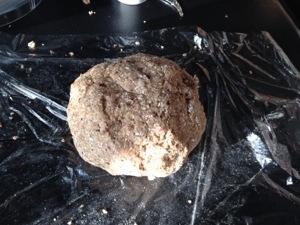
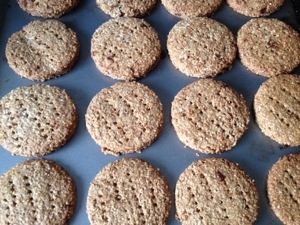 Mould into a ball to wrap in clingfilm and then pop in the fridge for at least 30 minutes (try not to eat too much of the raw dough while you are fiddling with it). When it has rested, simply roll out between two sheets of clingfilm (it’s a bit fiddly but means you don’t add too much extra flour to the mixture) to a thickness of 4mm and cut into discs. Arrange on a baking tray (I forgot to line the tray and they didn’t stick thankfully, but you may prefer to line your tray just to be safe!) and decorate with a fork.
Felicity suggests baking for 12 minutes in a 170 degrees preheated oven for a soft biscuit, and 15 minutes for something a bit more crunchy. I baked them for 15 minutes and they probably could have done with a little bit longer as a couple of them were slightly soft in the middle still, whereas I would have preferred a crunchier biscuit.
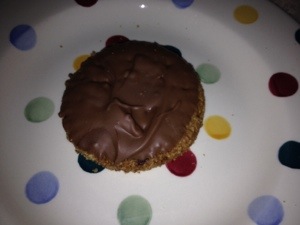
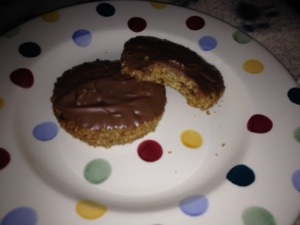
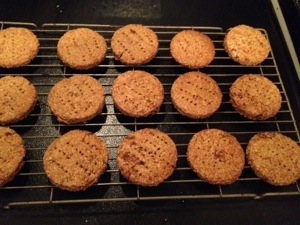 Remove from the oven and allow them to cool slightly on the baking tray before transferring them to a cooling rack, and then once completely cool, you can coat them in melted chocolate if you like. I used my favourite Waitrose Belgian milk chocolate and melted a 100g pack in a bowl, then took each biscuit and dunked it in the chocolate for a thin coating. Once I had dunked half the biscuits, I spooned the rest of the melted chocolate onto the already coated biscuits so that the milk chocolate layer was thicker.
There is literally no comparison between these and a shop-bought version. Despite my love of ones you find in the shops, I will never buy them again as homemade are vastly superior. The biscuit is thicker and crumblier (not really a dunker) than ones from the shops, and has a more savoury note to it (the non-chocolate coated versions would make a fabulous biscuit to serve with blue cheese). They are incredibly substantial and when you add your own chocolate you are in control of how thick it should be … that’s a nice position to be in, especially when you know you are going to be eating one shortly!
 Felicity’s recipe is supposed to make 10 biscuits, but I made 16 and probably could have rolled the dough a bit more thinly to make a couple more (especially if I hadn’t munched my way through quite a considerable amount of the raw dough, which is really very delicious).
My verdict is a ten out of ten. Although these are not the best for dunking, they would take pride of place on my homemade tea trolley with my custard creams, oat shortbread, ginger toms and bourbons. I now need to find a good recipe for malted milks and fig rolls and I’ll be in biscuit heaven.
Felicity’s recipe in full can be found on The Guardian website here. Let me know in the comments section which biscuits are your own favourites, as you might give me ideas about what to have for my next teatime treat!
My husband LOVES digestives. I should give these a try – although it would have to be dark chocolate topping for me!
Dark chocolate?! Noooooooo! Definitely give them a try, and let me know how you get on. They really are delicious. Good luck!
where is the recipe for choc digestives?
Hi Karen, it’s halfway down the page, or you can click on the link I shared to Felicity’s original post.