
 My lovely friend Charlotte is letting me bake a cake for her son Henry’s christening later in the month, and because I have been feeling the pressure, I wanted to do a test run of the cake. This meant that I had a 50 portion chocolate cake which needed a home last week, and as tasty as it was, it was beyond my greedy capabilities to eat the whole thing!
 So when I heard that Great Ormond Street Hospital planned to hold a Bake it Better fundraising campaign for their children’s charity on 13-19 October, I decided to put my practice bake to good use to support this worthy charity.
I spoke to Anna at the charity to get more information about the event. In a nutshell, Great Ormond Street Hospital are asking people to raise money for them by holding bake sales. They need this cash to raise vital funds for a new clinical building at the hospital. You can read more about it, and how you can get involved here.
They also have a selection of recipes on their website, but I am sharing with you below the chocolate christening cake recipe which will give you at least 50 slices of chocolate-y goodness – perfect for a bake sale. It’s based on this recipe which I found on the BBC Good Food website.
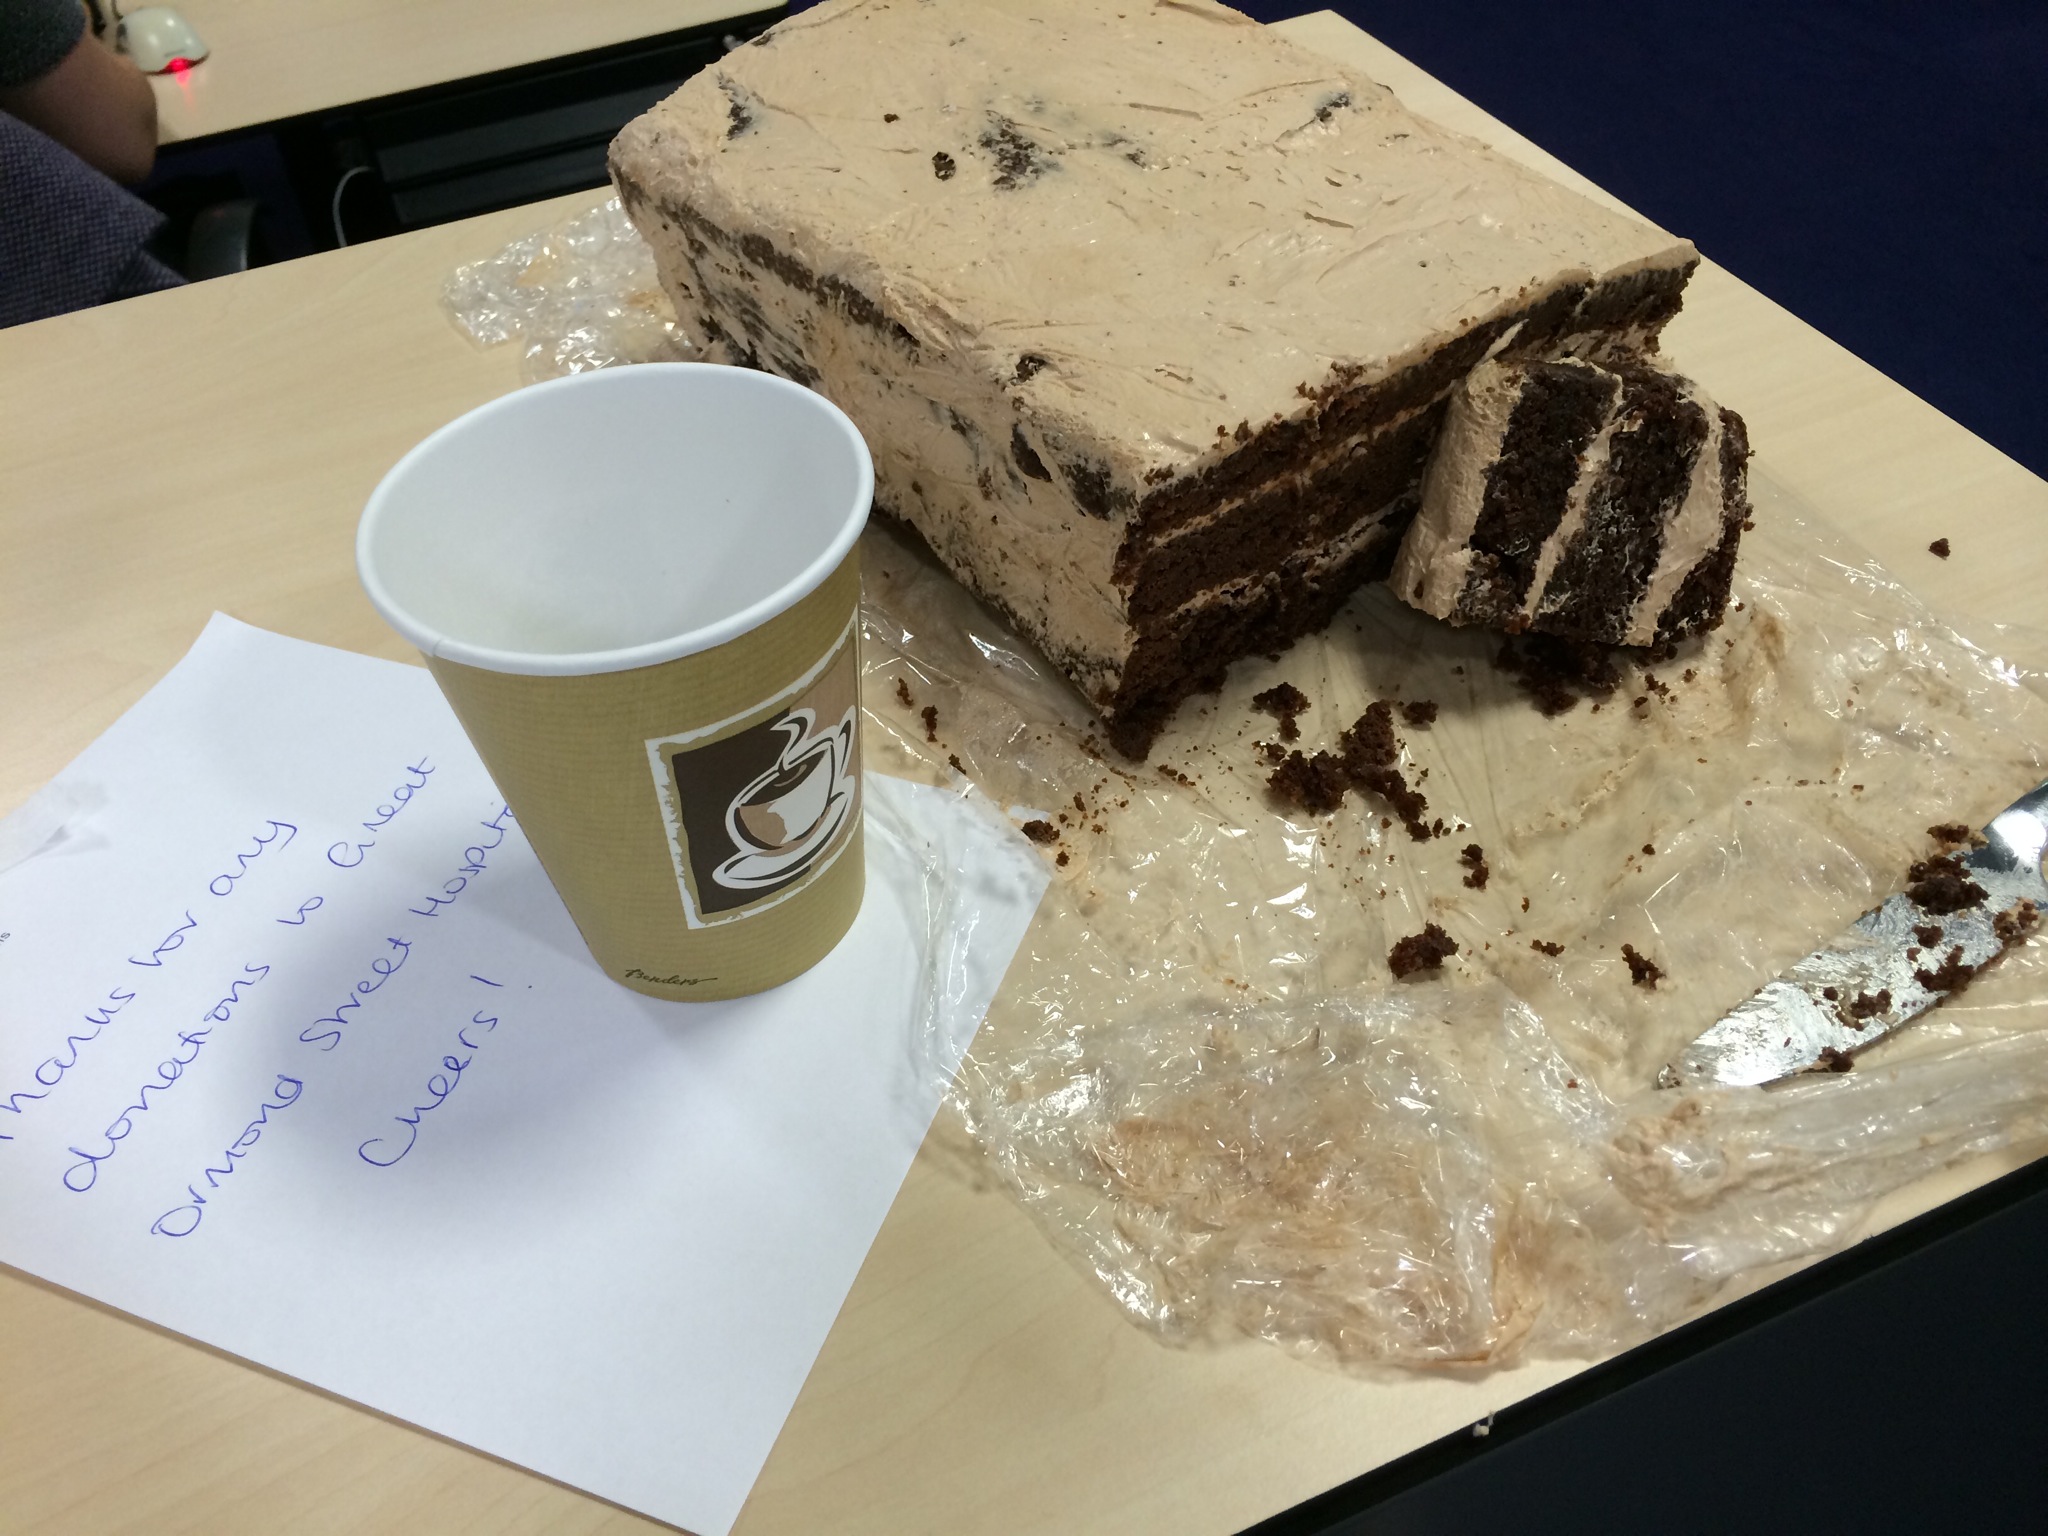
 I split the cake between my work, Andrew’s work and my mum’s work and had only positive feedback (and empty plates!) back. I also had to sample a bit myself (obviously) and even after several days of sitting around covered in clingfilm, the cake tasted wonderful so it’s perfect to cook in advance if necessary. I asked people to donate to the charity and (with a small top up by me to round it up) raised £50 which I’ll be passing along to Great Ormond Street Hospital’s campaign, so thanks to everyone who sampled the cake and gave me some cash!
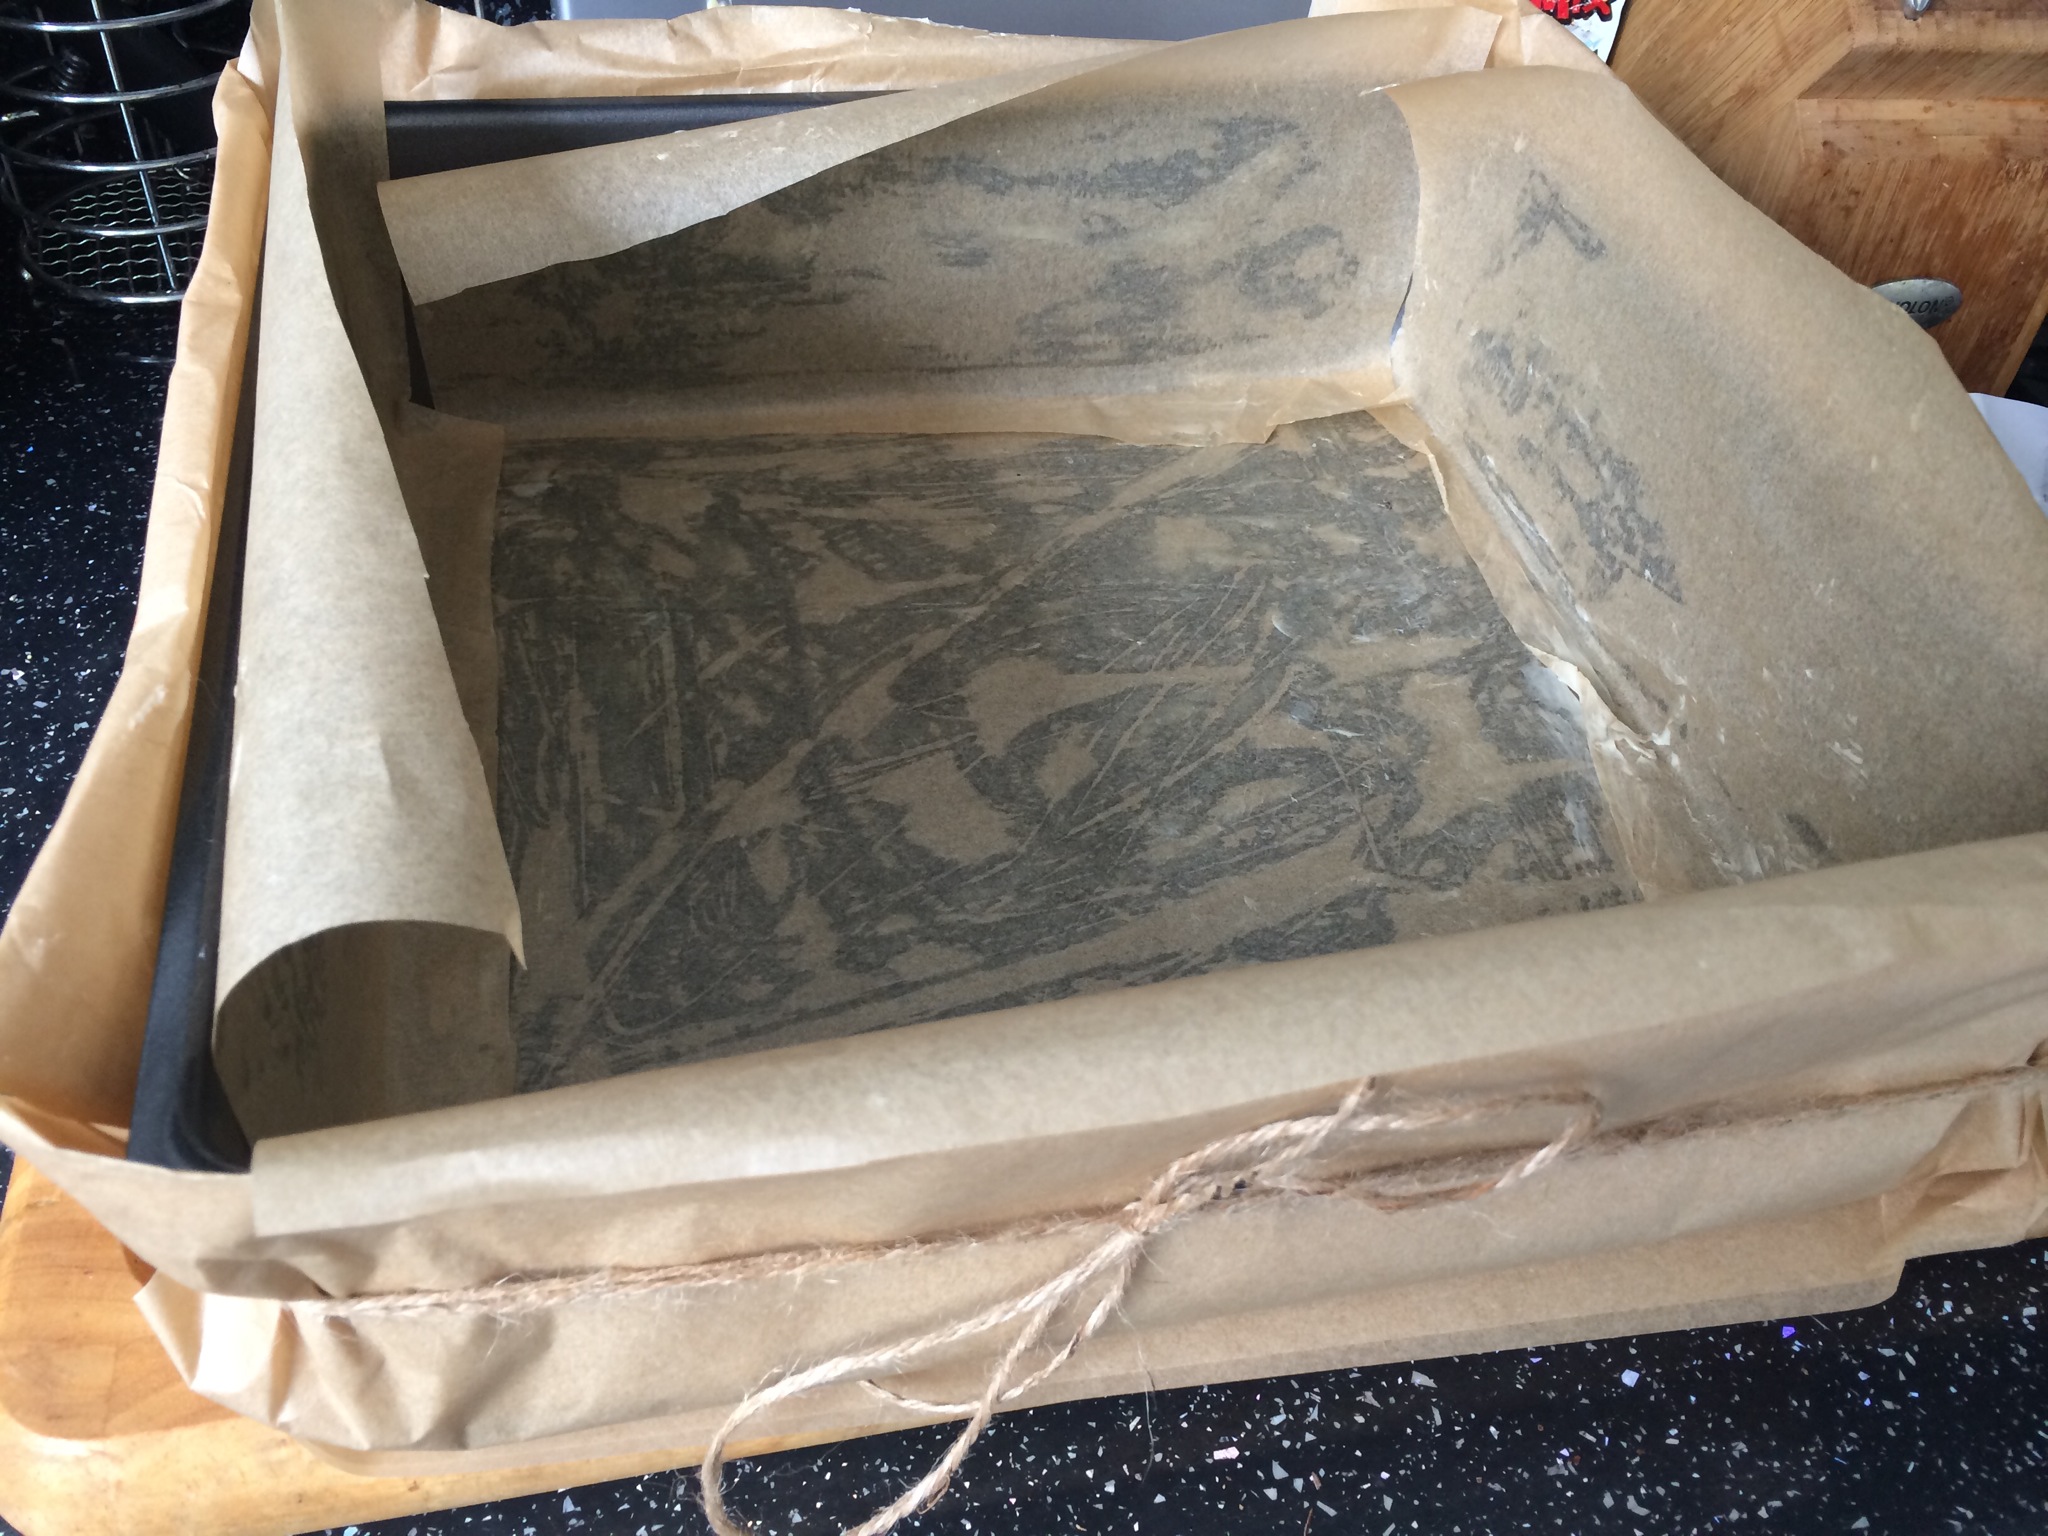
As you might expect for a cake which serves 50 people, you are going to need a big tin for this monster – I used a 30cm square loose bottomed tin which was perfect. Make sure you double line the outside of the tin (you can see what I mean in the pictures) as the cake needs to be in the oven for 2.5 hours so the double lining helps to protect the outside of the cake whilst the inside cooks.
 A chocolate cake that makes people say “GOSH”! – serves 50
- For the cake: 650g butter, 650g plain chocolate, 100ml coffee, 3tbsp vanilla extract, 650g plain flour, 2tsp baking powder, 2tsp bicarb, 950g light brown soft sugar, 10 eggs, 570ml sour cream
- For the chocolate buttercream: 500g butter, 200g icing sugar, 200g milk chocolate
Before you start cooking, pre-heat your oven to 140 degrees / GM3, and prepare your tin by greasing and lining the inside and double lining the outside (see picture). I also put a layer of tin foil on the inside of my tin to ensure the mixture wouldn’t leak out of the loose-bottomed tin (probably a needless concern, but just in case …). Find your biggest bowl as there is a LOT of mixture here, so you’ll need a large bowl to mix it all together.
 Melt the chocolate and butter together in a large saucepan and once melted add the vanilla and coffee (which you can’t taste in the finished cake, so add it even if you are not a coffee fan) and remove from the heat.
Into your mega-bowl sift in the flour, baking powder and bicarb, then add the sugar and mix – break up any lumps with your fingers so you have a smooth and well combined set of dry ingredients. I wouldn’t normally bother sifting the ingredients but I wanted to do this cake properly so did, and of course it meant that I didn’t have lumps of bicarb ready to explode in the cake, so I recommend you do the same.
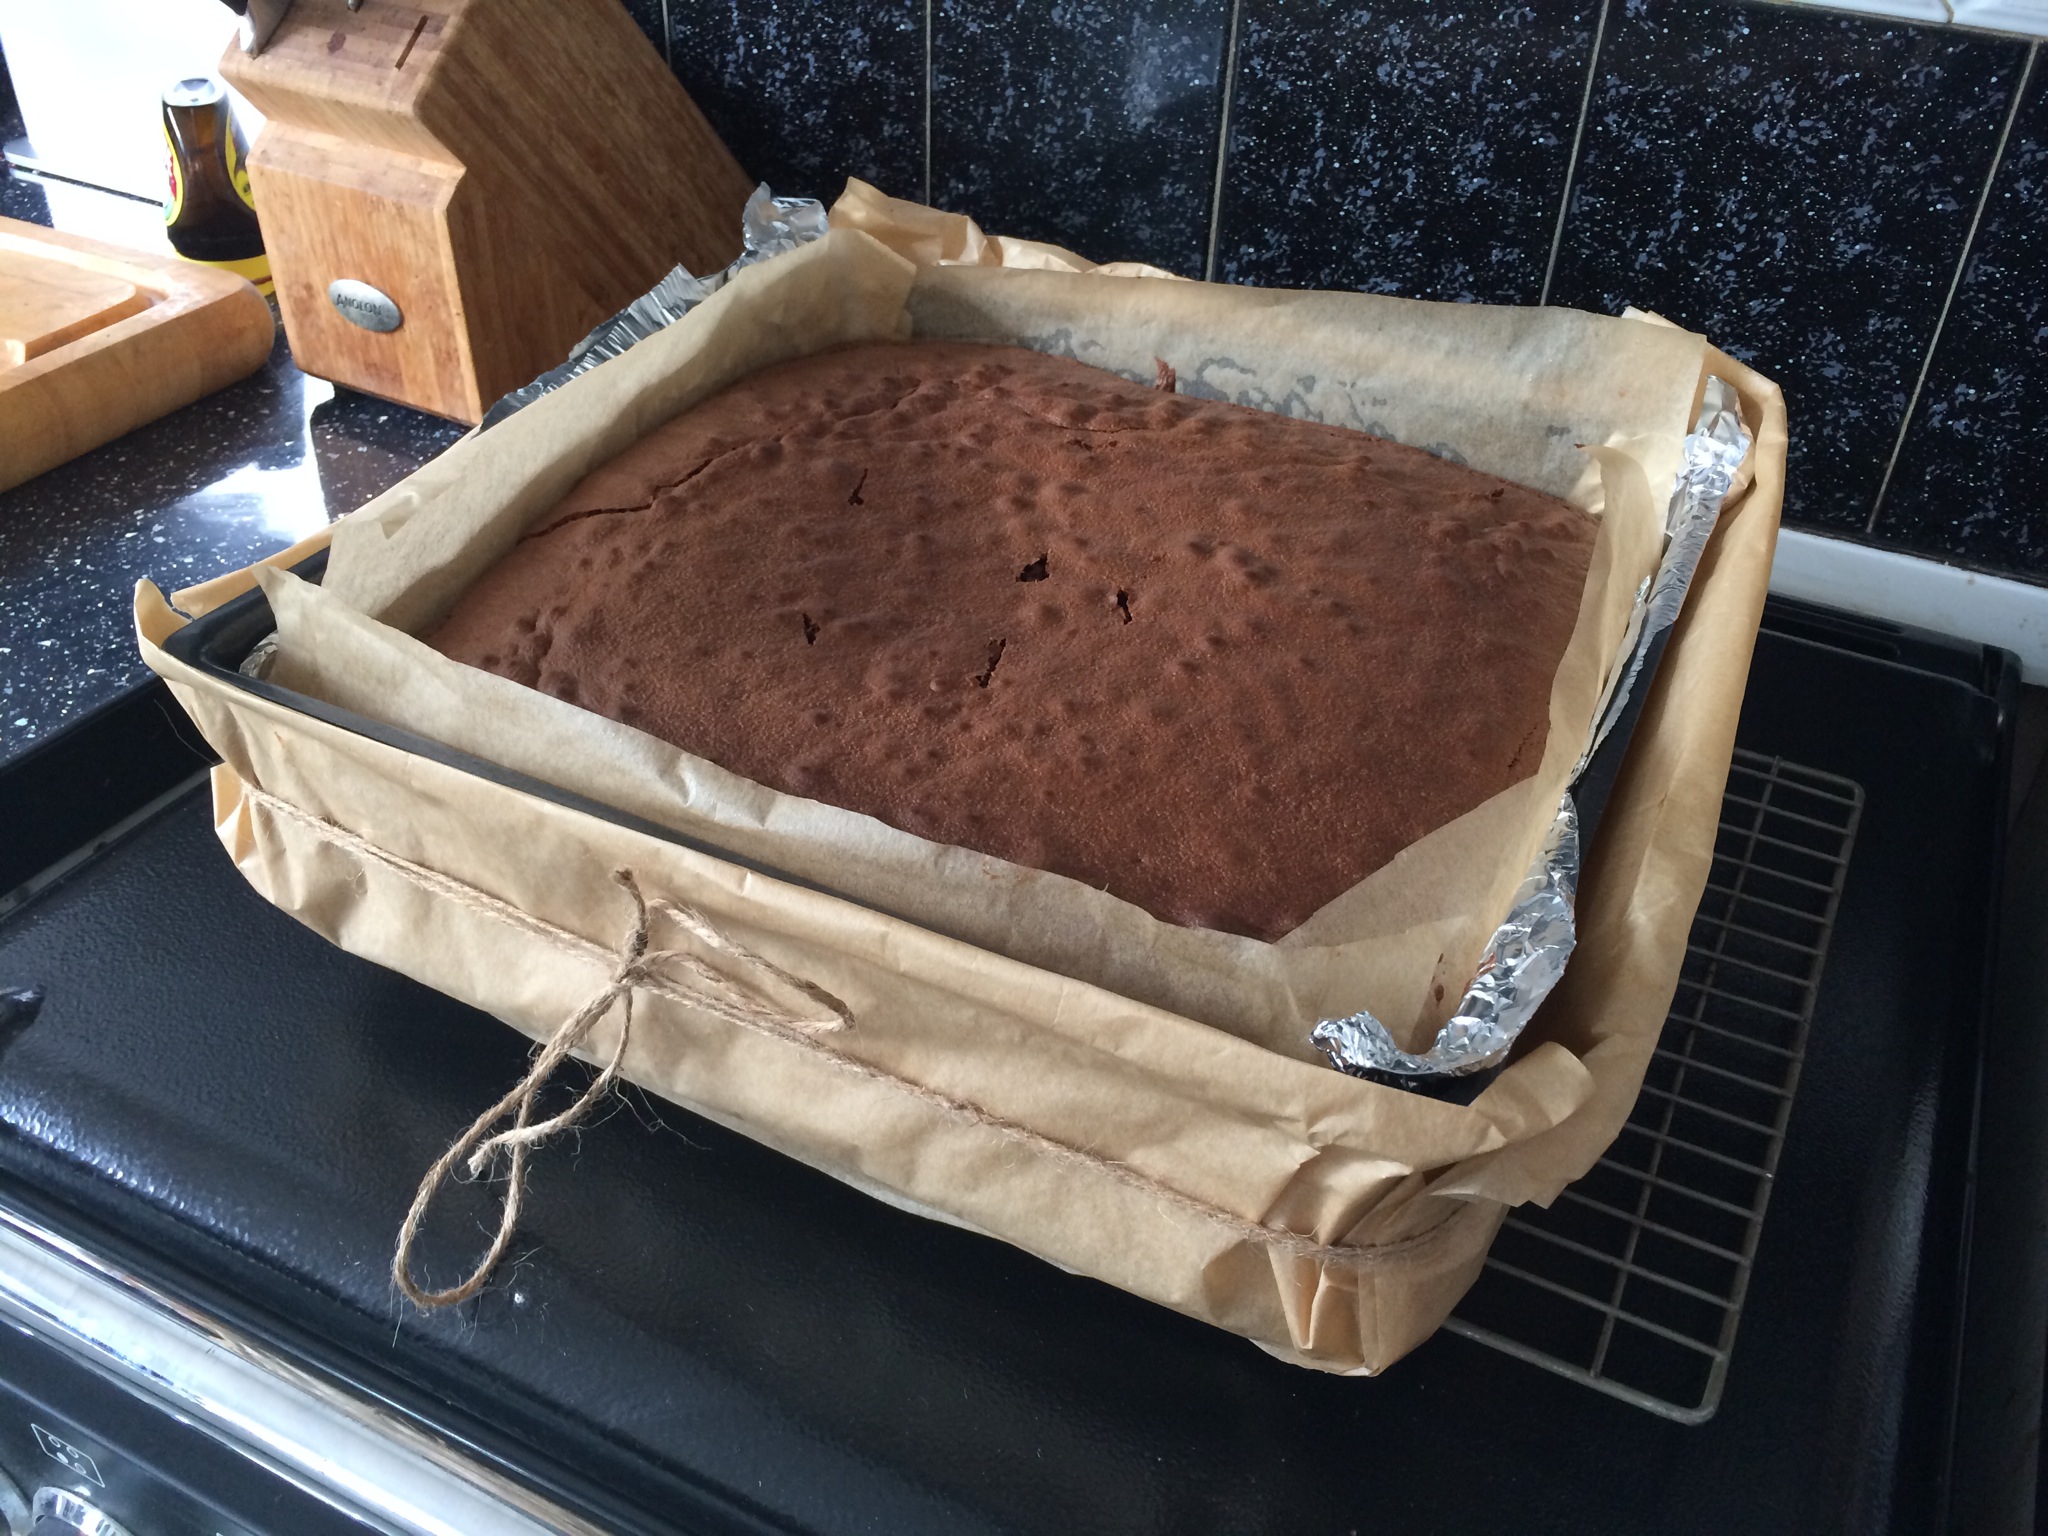
 In a large jug, beat together your eggs and sour cream. Those can then be mixed in to your dry ingredients, followed by the chocolate and butter mix. You will end up with a relatively liquid batter which smells richly of chocolate. Take the time to mix it well as there’s a lot in that bowl and you need to make sure you scrape the sides! Pour that yummy batter (er, I may have licked the bowl) into the prepared tin and then bake it in the centre of the oven for 2.5 hours. You must not even think of opening the oven door for 2 hours, which was a real test of nerve for me. At just after 2 hours I skewered the cake to see if it was cooked and although the skewer came out clean I decided to leave the cake in the oven for the full 2.5 hours just in case. I ended up with a perfectly cooked cake after this time, so keep your nerve and leave it!
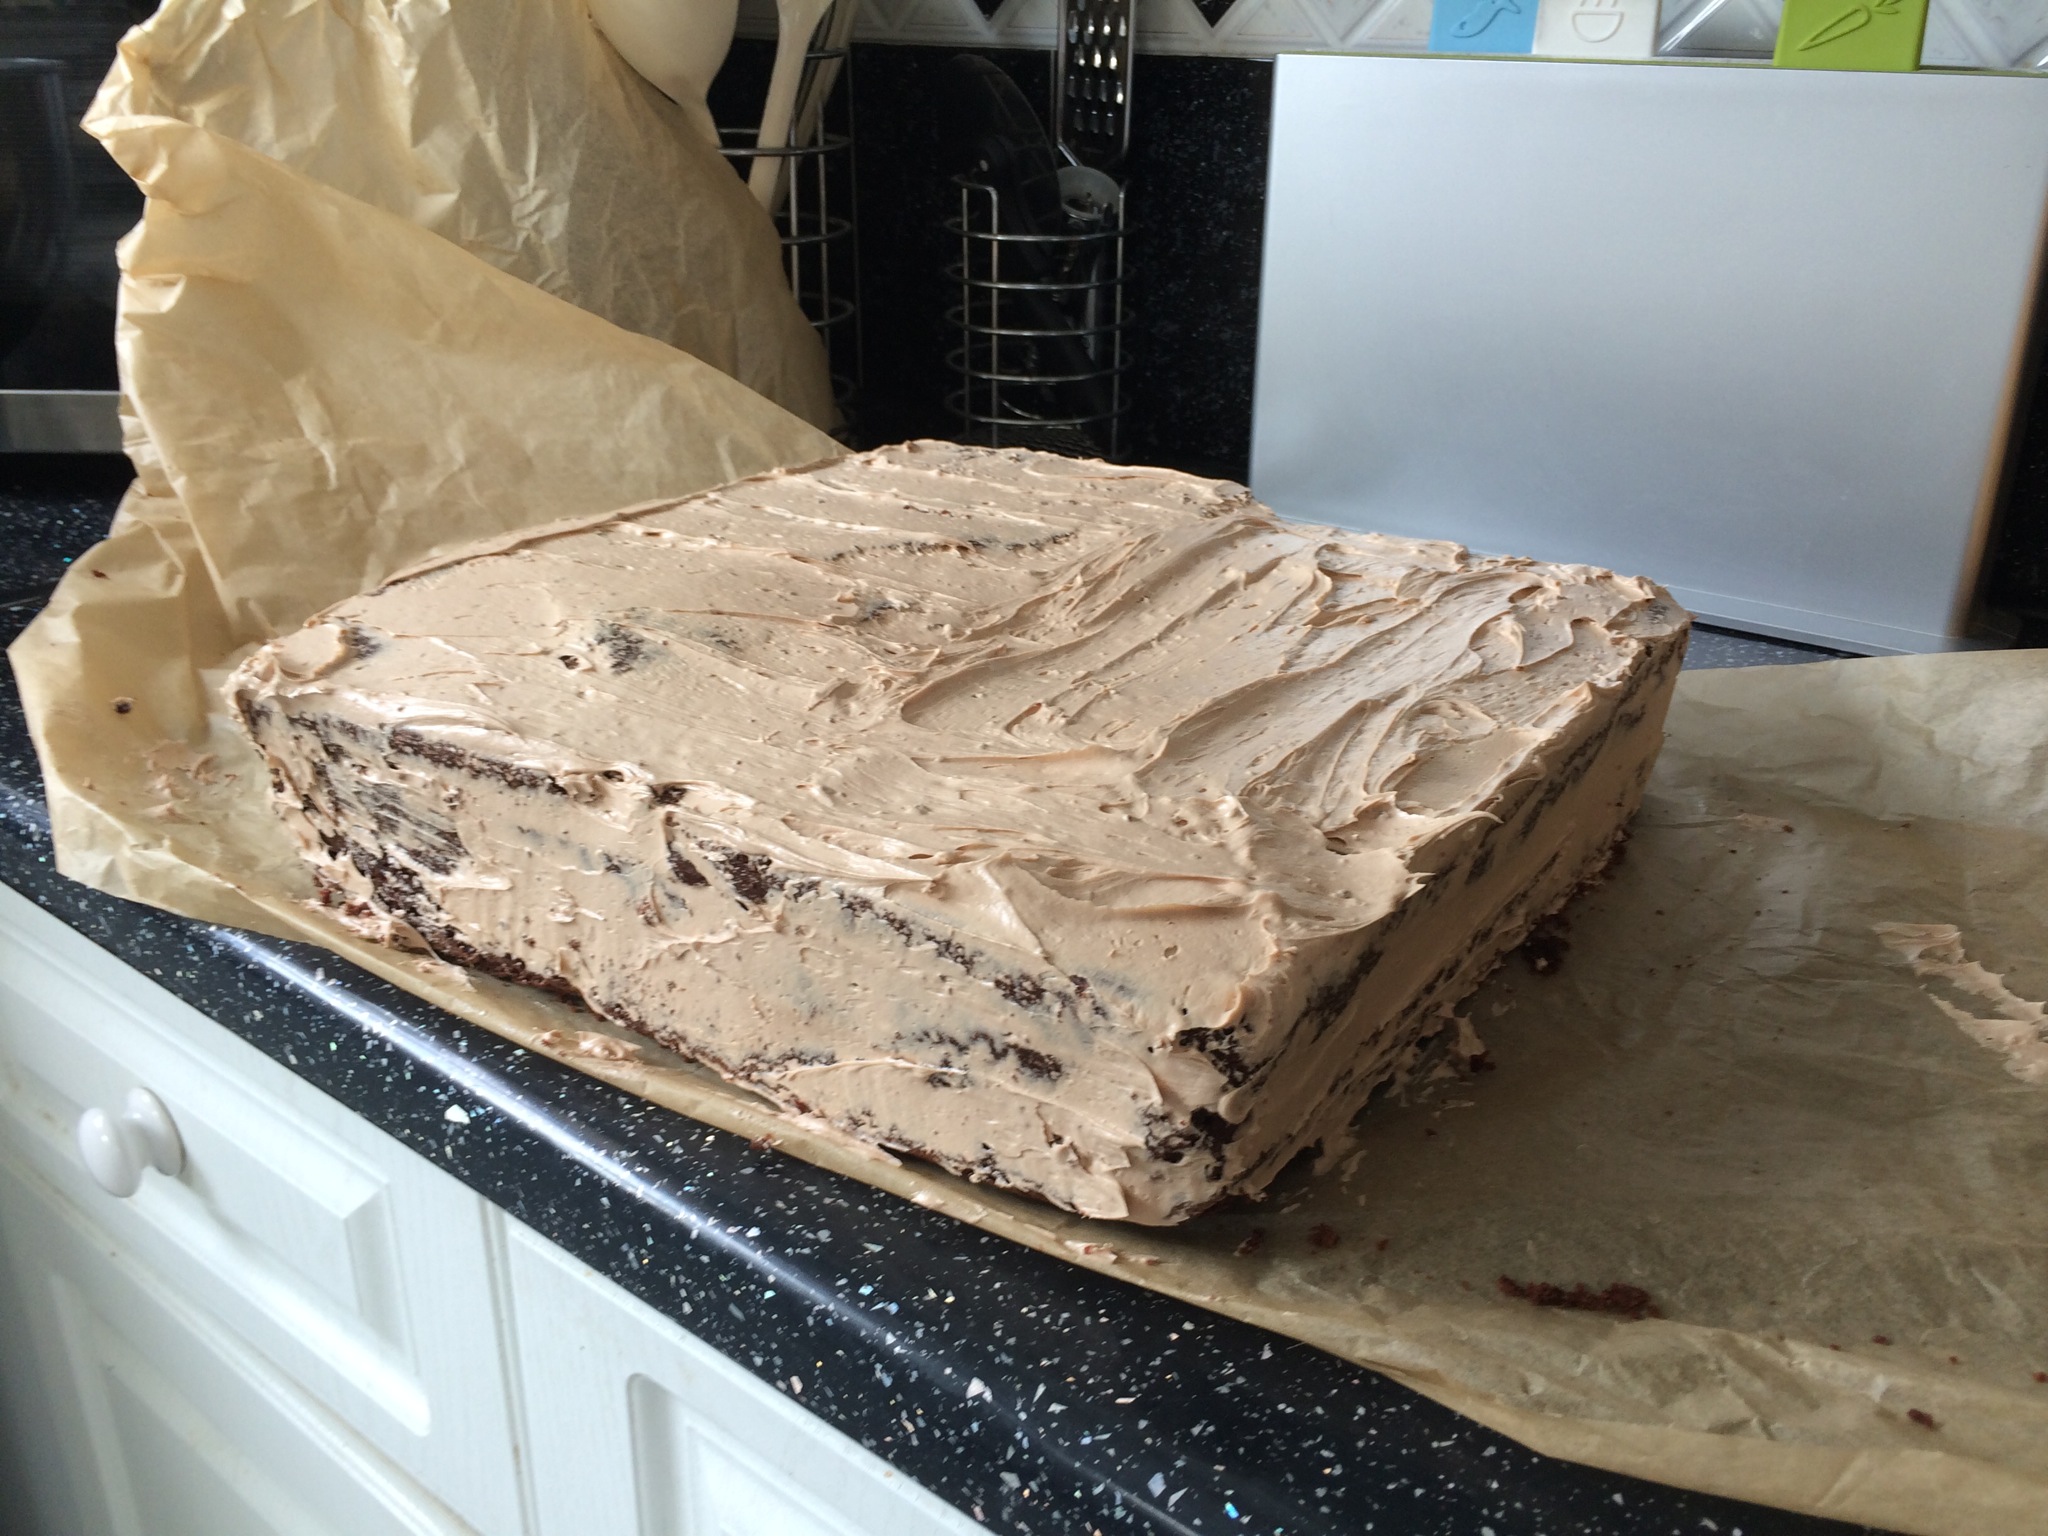
Once you remove the cake from the oven, leave it to cool completely in the tin (I left it in there until the next day when I was ready to ice it.
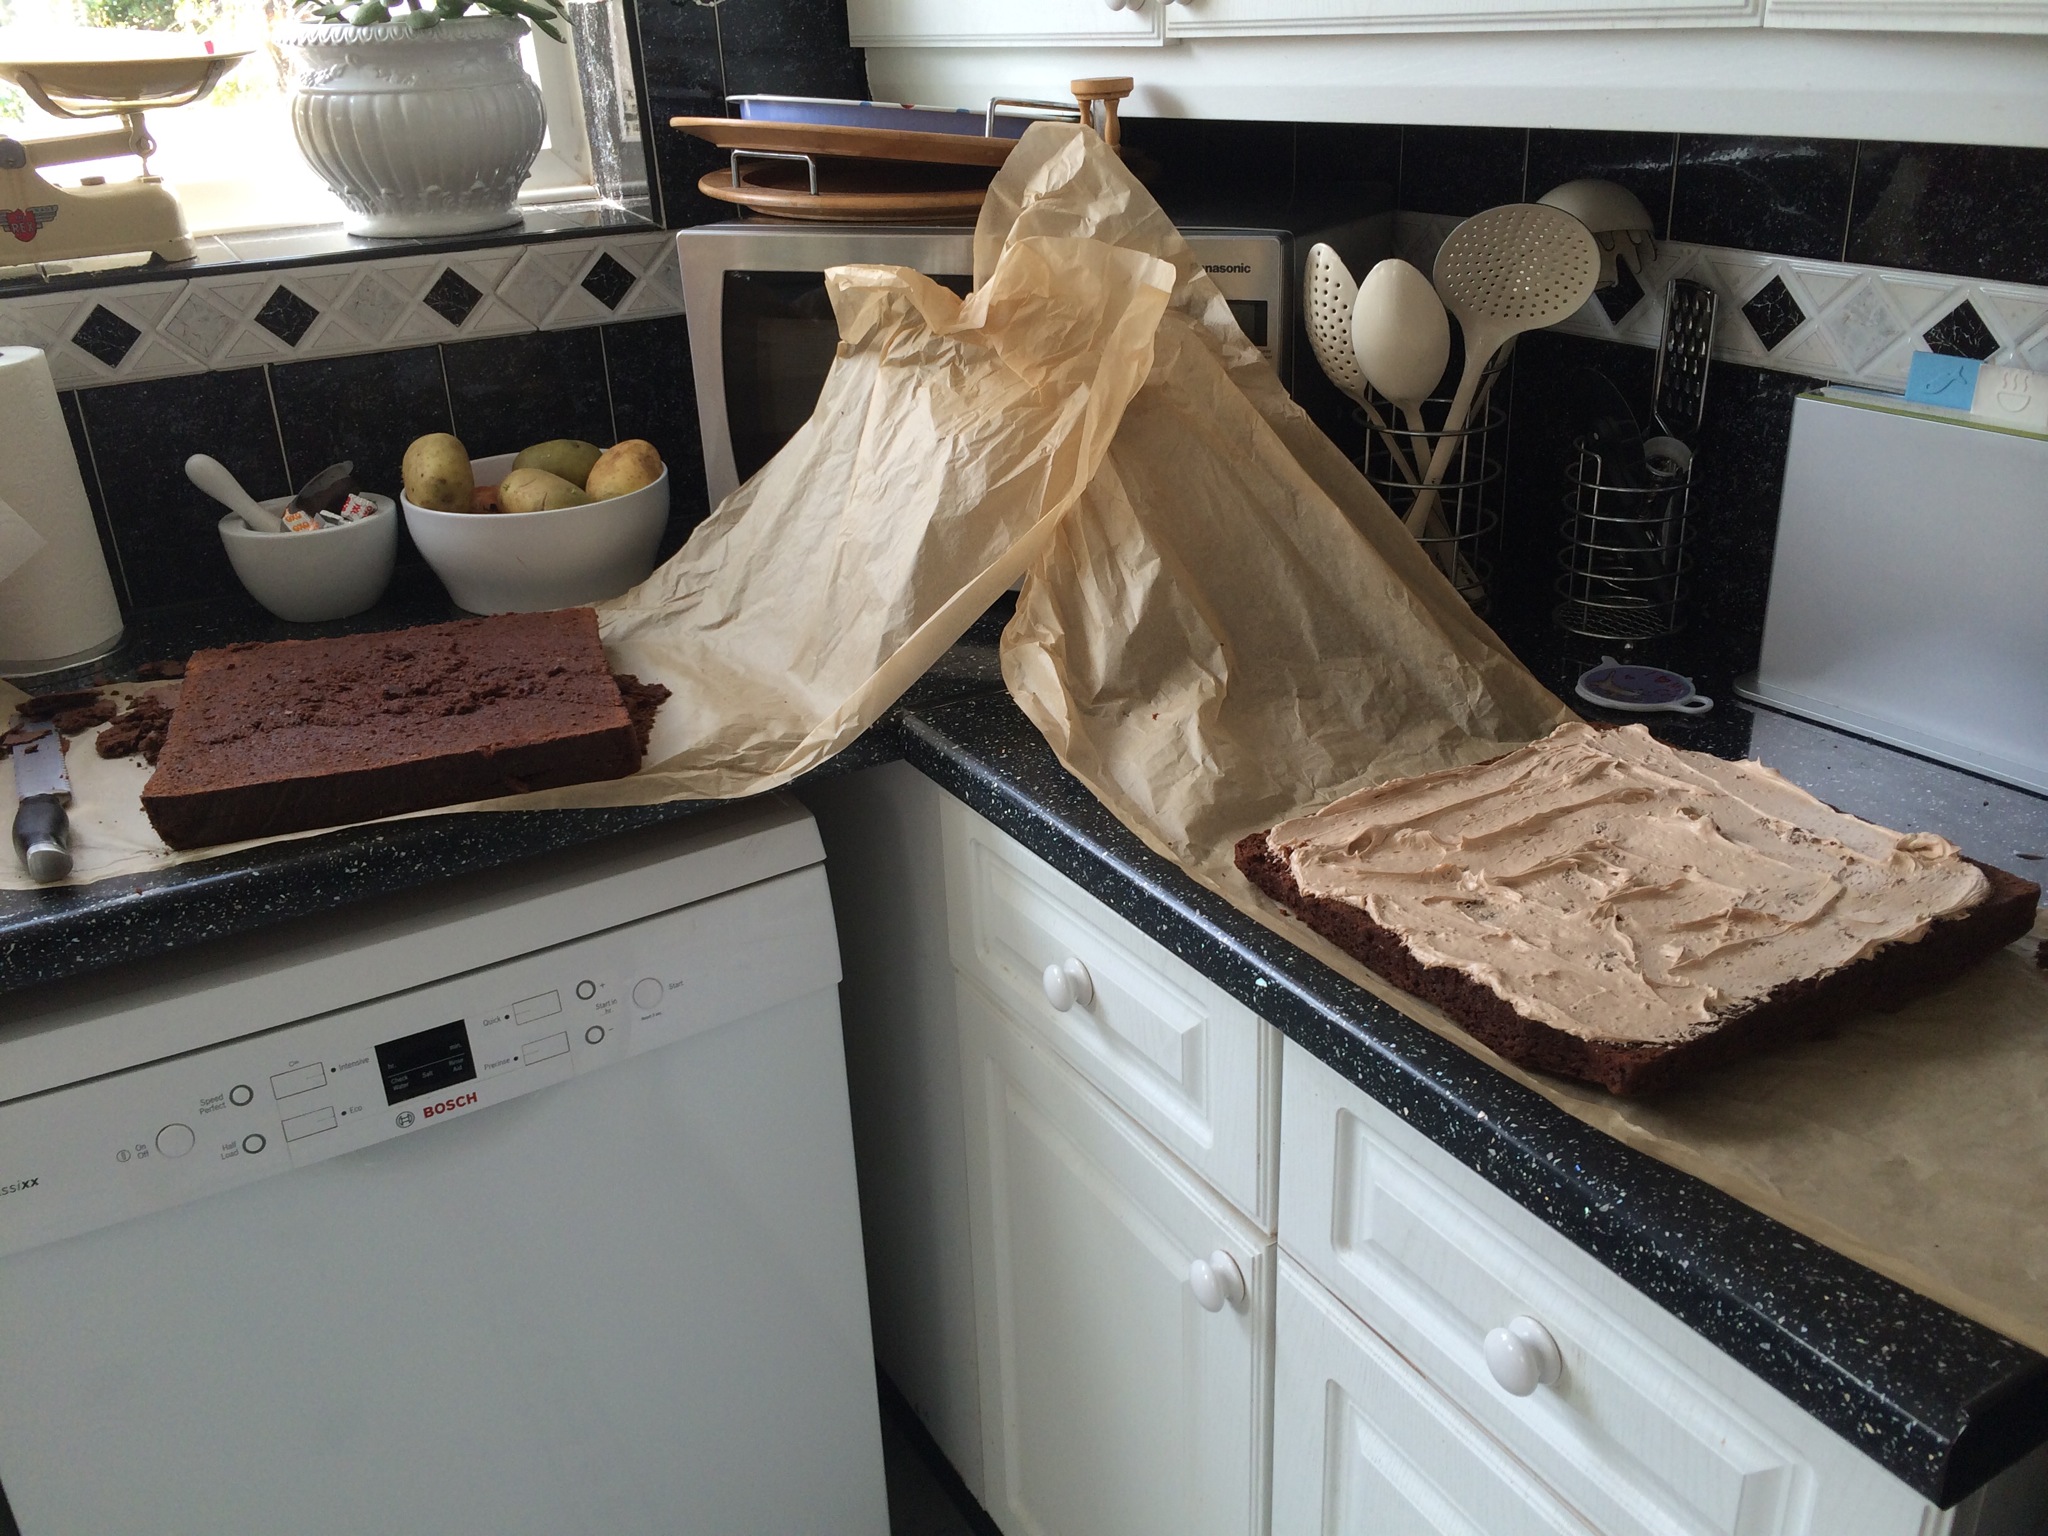
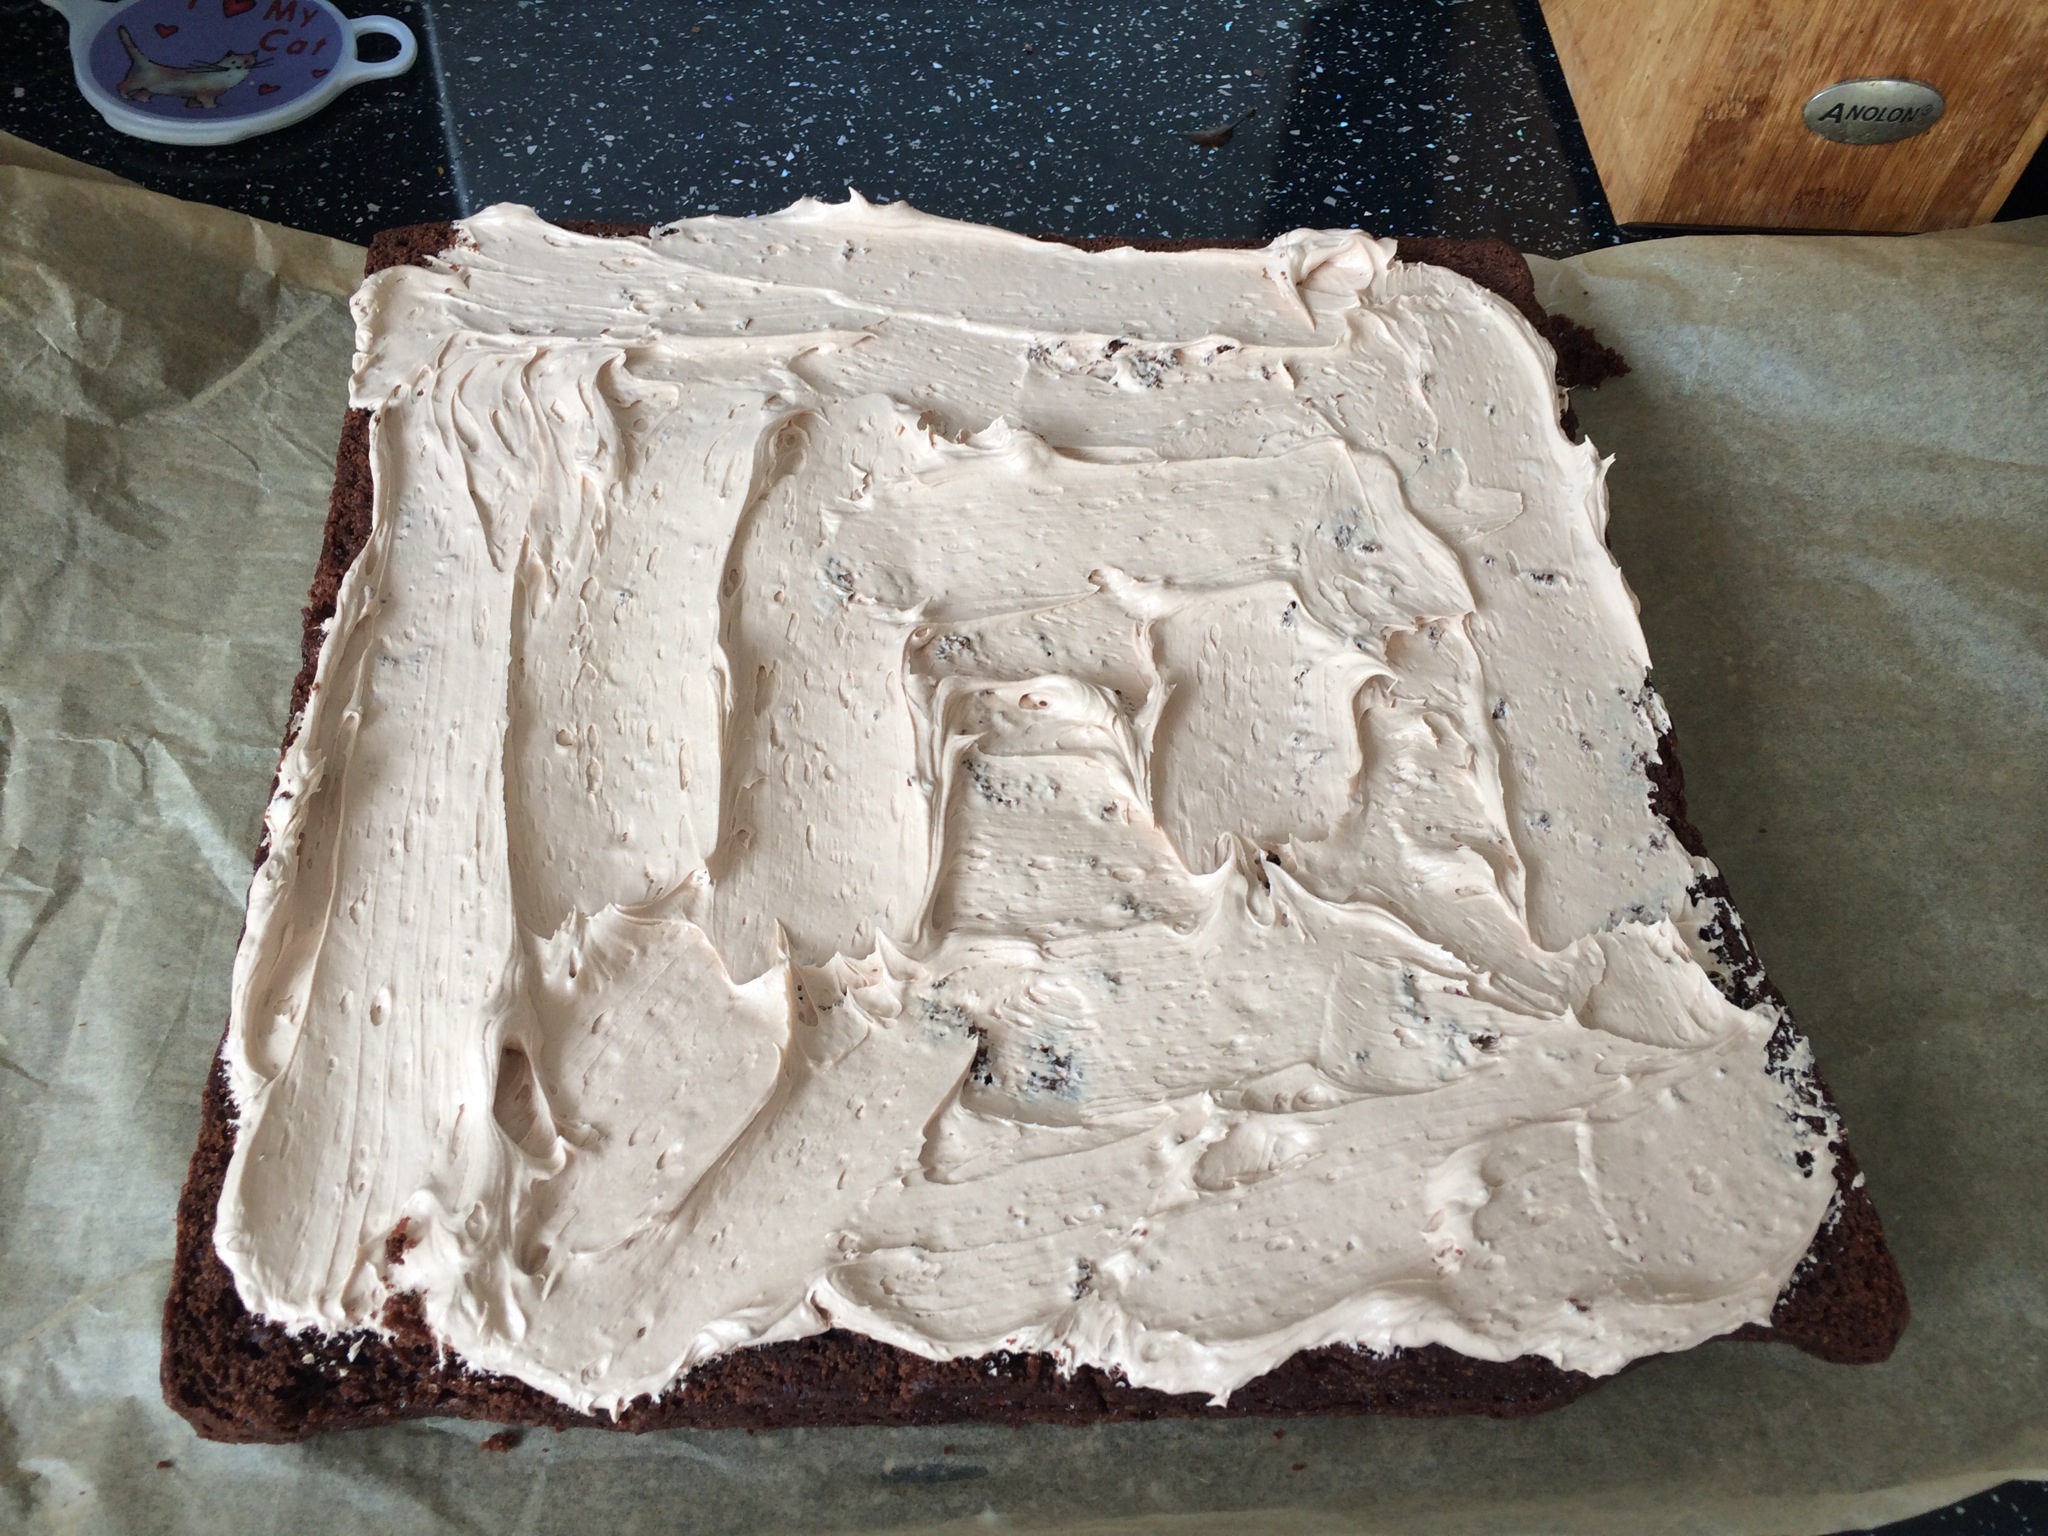
 My icing was my own creation: a 500g pack of salted butter whisked in my lovely KitchenAid until light and fluffy, mixed with approx 200g of icing sugar and 200g of melted milk chocolate. This makes a beautiful buttercream which tastes very chocolatey, although it does make the buttercream quite light in colour. My mum thought it was a touch sweet, so feel free to add the icing sugar according to taste. Dark chocolate would, I assume, sweeten the icing less.
The assembly was, frankly, a pain in the neck. I had never made such a large cake and so all my kitchen utensils were woefully inadequate for this challenge. But that’s what practice runs are for, and a subsequent trip to the kitchen department at Selfridges has made me well-prepared (I hope) to make the christening cake this week. I will be keeping you informed.
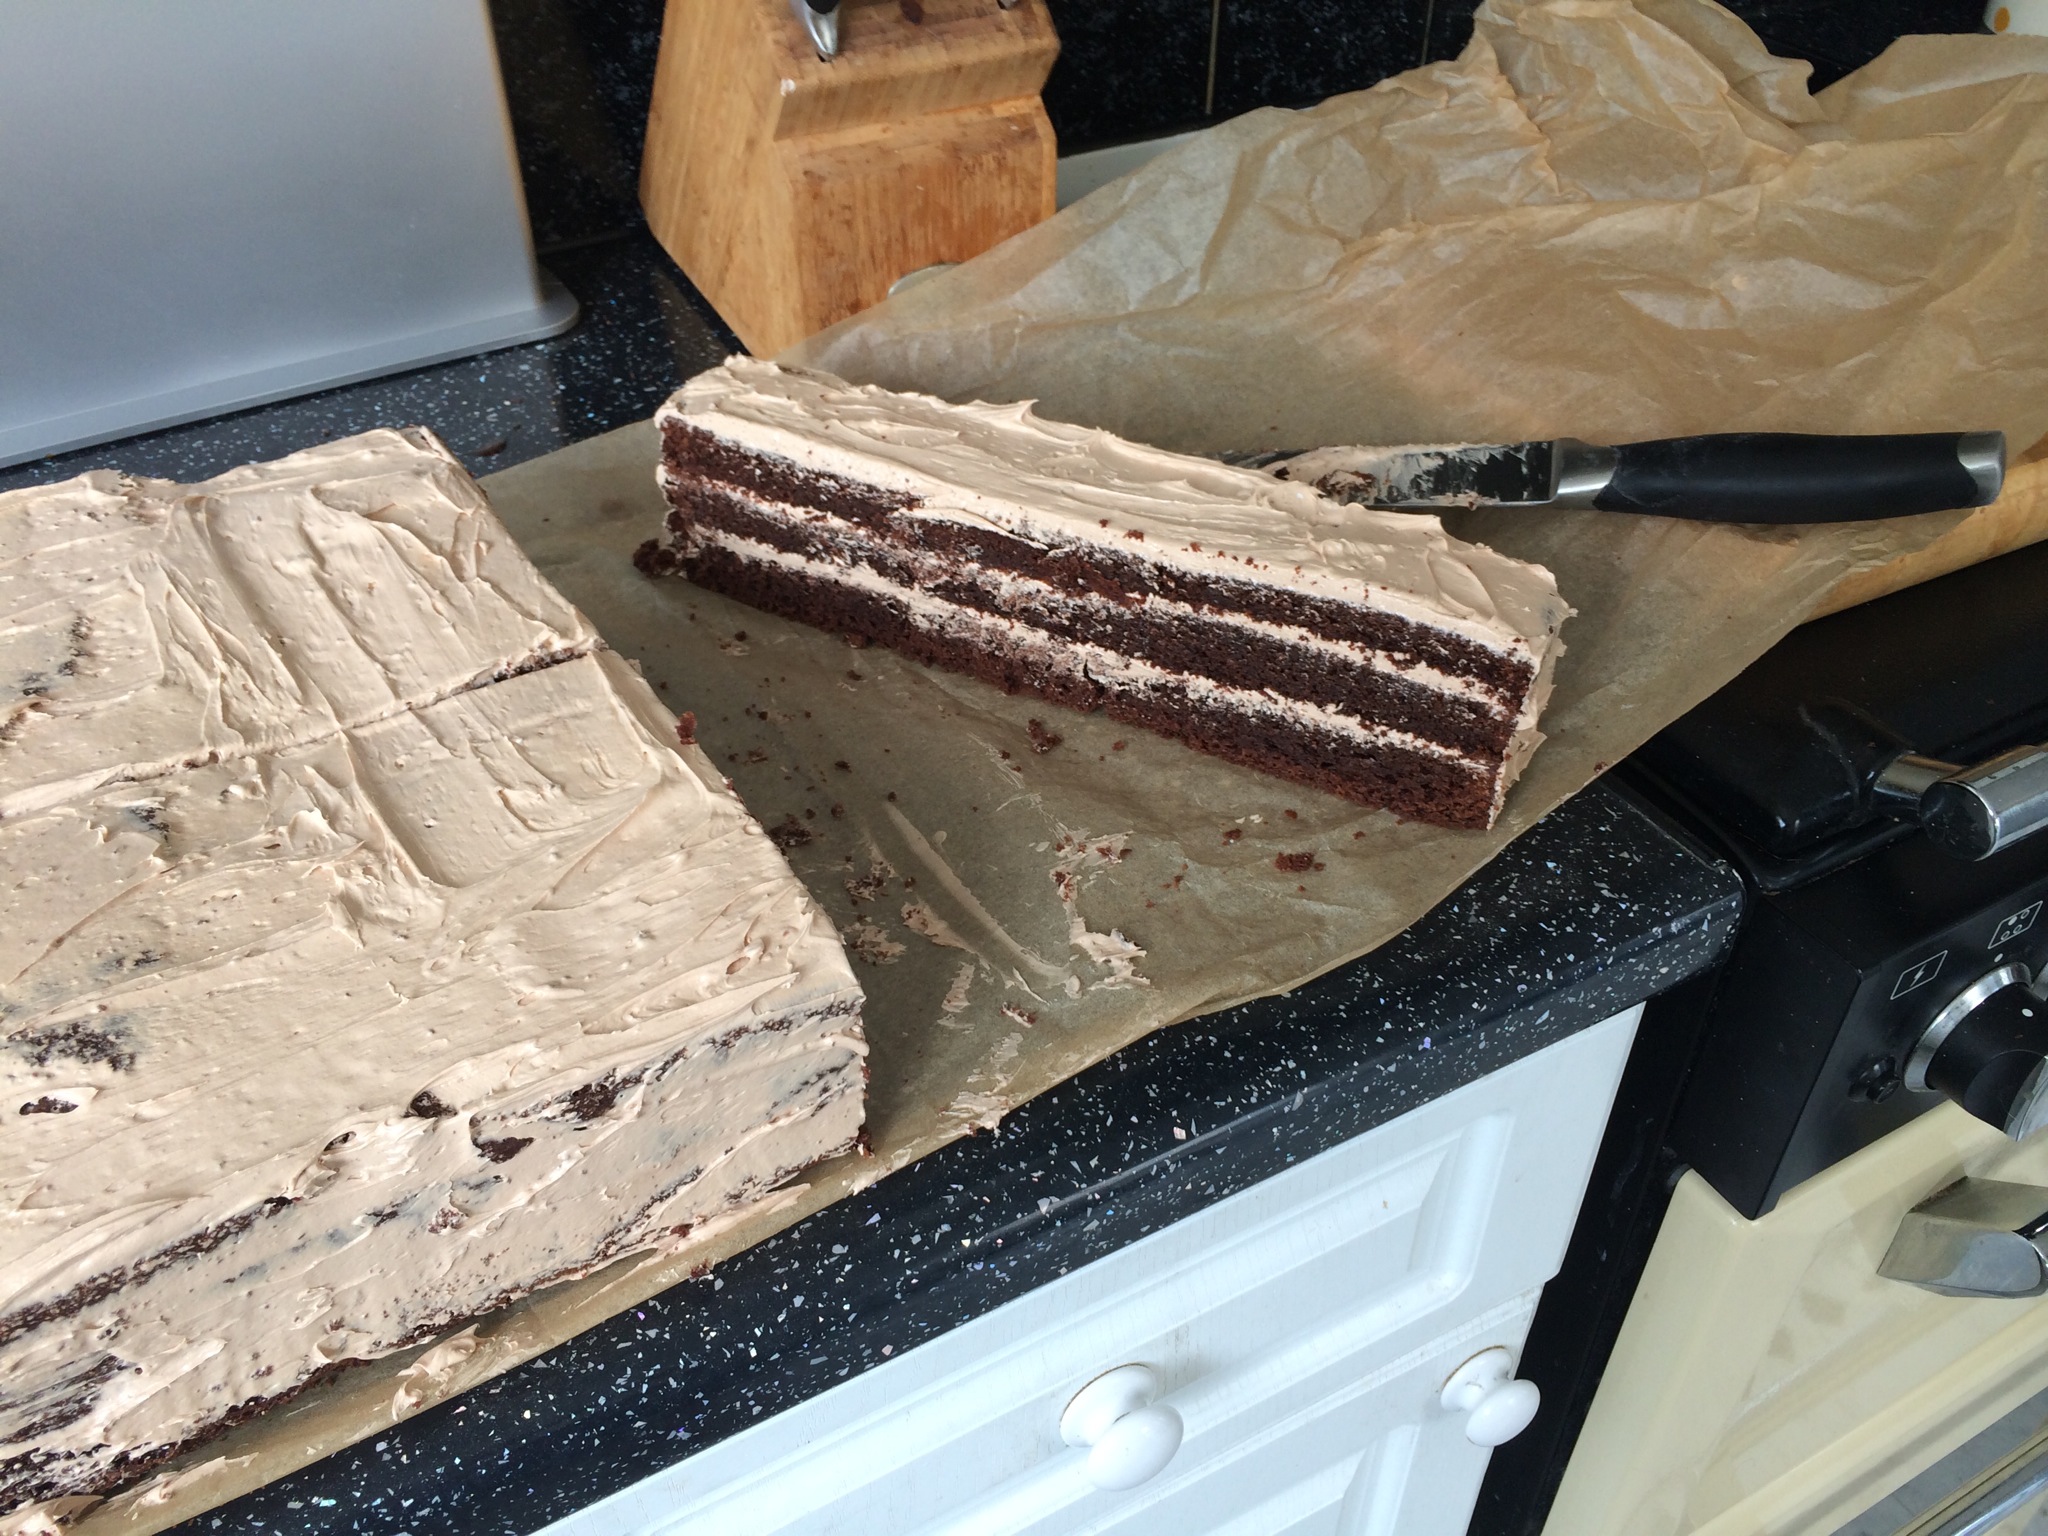 So you’ll need a large cake board for the cake (or in my case a lot of foil!), and first need to level off the top of the cake to make it sit as evenly as possible on your board (as the top of the cake becomes the bottom once you have levelled it out). I sliced the cake horizontally as best I could using my serrated bread knife. All I can say is that it’s just as well I had a large amount of icing to hold it together, as the cake broke in several places as I transferred it to the foil (I now own a cake leveller and a big round spatula thing which you use to transfer cakes from board to stand).
You need to split the cake into three layers so plenty of patience and buttercream will be called for to tidy the layers up (that’s what icing is for), and as you would expect you end up with a tall and beautiful chocolate cake, which tastes AMAZING!
If you do end up making this cake, let me know how you get on in the comments section. And even if you don’t end up hosting your own Bake it Better sale, then please consider donating some money to Great Ormond Street Hospital for this worthy cause. You can watch how people could be affected by your donations in this touching video created by the charity.
Good luck to everyone who does take part, and Happy Baking!
This cake is delicious!
Thank you!
Just delivered all my cakes for the Bake it day, looking to be able to donate at least £150. So pleased to have such good friends and neighbours. Have more orders for next week because couldn’t fit anymore in for today, so next looking at another £75 so in total £225 at least. A very happy lady today.
That’s fabulous – well done 🙂